Announcement

Collapse
No announcement yet.

BC-12D Cowl Material

Collapse
X
 
  • Filter
  • Time
  • Show
Clear All
new posts

  • BC-12D Cowl Material

    I'm planning on rebuilding the lower cowl on my '46 BC-12D prior to selling it. Does anyone out there know off the top of their head what specific material is used so I can get it ordered for my A&P? Thickness, Alloy?? I'm not near the plane right now, so I can't look to see if it's stamped on there anywhere.

    Thanks in advance.

    BTW... If anyone is interested in buying a '46 BC-12D that's hangared in Arkansas, let me know.
    Later!!

    Andy

    Don't you hate it when you can't come up with something witty or profound for your signature??

  • #2
    More info on the hanging plane? Can you identify it? Also on your cowl there were two types right after the war. Does it lay flat on the floor when you take it off or does it have a slight compound curve so it will almost stand up on the aft edge? The compound curve ones are a lot harder to make but give a bit more clearance to the bottom of the engine. The flat lower cowls won't fit on some of the earlier planes. Notice the "Belly curve" in the photo of an early cowl.
    Click image for larger version

Name:	032.JPG
Views:	247
Size:	134.6 KB
ID:	192340

    Hank

    Comment


    • #3
      Hi Hank,

      This is a picture I took a while back. Hopefully it answers your questions.

      If you look carefully at the right latch, you'll see a crack. In the 7 or 8 years I've owned this bird, it hasn't expanded, but it has gone beyond the drill stops. If it turns out to be too big of a pain to replace the cowl, I may just patch it and call it good. Otherwise the cowl is fine.

      Click image for larger version

Name:	Cowl.jpeg
Views:	235
Size:	118.8 KB
ID:	192342
      Later!!

      Andy

      Don't you hate it when you can't come up with something witty or profound for your signature??

      Comment


      • #4
        [Edit after seeing Anymouse's photo: That's definitely compound curve]


        I don't know the exact alloy, but it's not 2024; it's much softer. All the 1946 Taylorcraft I have seen (and that's many) have a compound-curved lower cowl, as Hank says.
        There is an interesting photo "out there" somewhere in the ether that shows the huge die that the factory used to stamp these out in one piece. The F22 had a "flat" curved lower cowl, but that was much later, and was for the Lycoming 0-235 engine. A very ugly cowl.

        The two photos below give some indication. First one is my '46; second photo is an F22 (white aircraft).
        Rob


        Last edited by Robert Lees; 02-03-2022, 08:59.

        Comment


        • #5
          originally 2SO, which I think is 5052-O today. An easier material to get many people use is 3003.

          Comment


          • #6
            The cowl skins are made from lower strength alloys as they offer better formability properties than the higher performance 2xxx, 6xxx and 7xxx series alloys. Physically making them is more important to material selection than the loads they have to support in service.

            3003 is what beer cans are made of but this has been supplanted by 3004 which is a bit higher performance and improved corrosion resistance. A good indicator of formability is the difference between the yield strength and ultimate tensile strength.
            Yield = force required to make a permanent form.
            Ultimate = force required to tear it in two pieces.

            Compound curves are made via two common ways (there are others), stretch forming over a die in a stretch press or with an English Wheel. The upper skins are flat wrapped and can be rolled.

            The nose bowl is made in a deep draw die, in a press.

            In the L2 drawings the nose bowl is called out as 3SO, 3003-O, the lower skins are 3S 1/2 H (hard), 3003, 1/2 hard in today's alloy numbering system. Upper skins were 2S or 3S 1/2, 2S is 1100 in today's system.
            Mark
            1945 BC12-D
            N39911, #6564

            Comment


            • #7
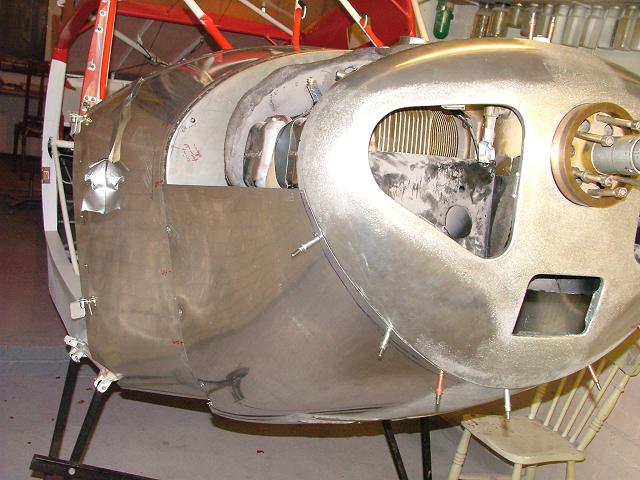
              Shrinking the leading edge of the lower cowl creates a compound curve and a nice fit with the nose cowl. I did mine with a simple vice mounted shrinker.

              The difficult part is making the trailing edge flange and vents.

              Material thickness is 032"
              Scott
              CF-CLR Blog: http://c-fclr.blogspot.ca/

              Comment


              • #8
                Reviving an old thread. My 1946 BC-12D is in desperate need of a new lower cowl. Previous owner made it out of flat sheet, without the louver vents and without the flared down portion at the rear. I had previously installed Champ exhaust to replace the failed Taylorcraft exhaust ( parts were on hand and paperwork from Terry made it a no brainer). I have Plane Exhaust fabricating the Taylorcraft exhaust out of stainless so that should be a significant improvement. So instead of patching the old cowl again, I figured I would make a new one. Would like to match the original as close as possible. OH, an I am currently in A&P school, so have access to more Sheetmetal tools than I have at home. Thanks for any help

                Comment


                • #9
                  TALORCRAFT Taylorcraft BC12D aircraft restoration maintenance fabric sheet metal paint airplane repair wing aileron fuselage cowling A65 PA 18 super


                  Scroll down, about three quarters of the way down for cowling fabrication.
                  S
                  Scott
                  CF-CLR Blog: http://c-fclr.blogspot.ca/

                  Comment


                  • #10
                    I saw that and have read it several times. What are the approx dimensions and layout for the louvers? And the dimensions on the lip at the rear of the cowl?

                    Comment


                    • #11
                      I estemated the sizes from photos at 4.5" and 5.5" by 1.375". The wider ones are in front. I started with two .25" holes 5.25" and 4.25" on center. The bolts that pulled the forms together went through these holes.

                      The lower flange is .625" at its widest point.
                      S
                      Scott
                      CF-CLR Blog: http://c-fclr.blogspot.ca/

                      Comment

                      Working...
                      X