Announcement

Collapse
No announcement yet.

Some wing progress

Collapse
X
 
  • Filter
  • Time
  • Show
Clear All
new posts

  • Some wing progress

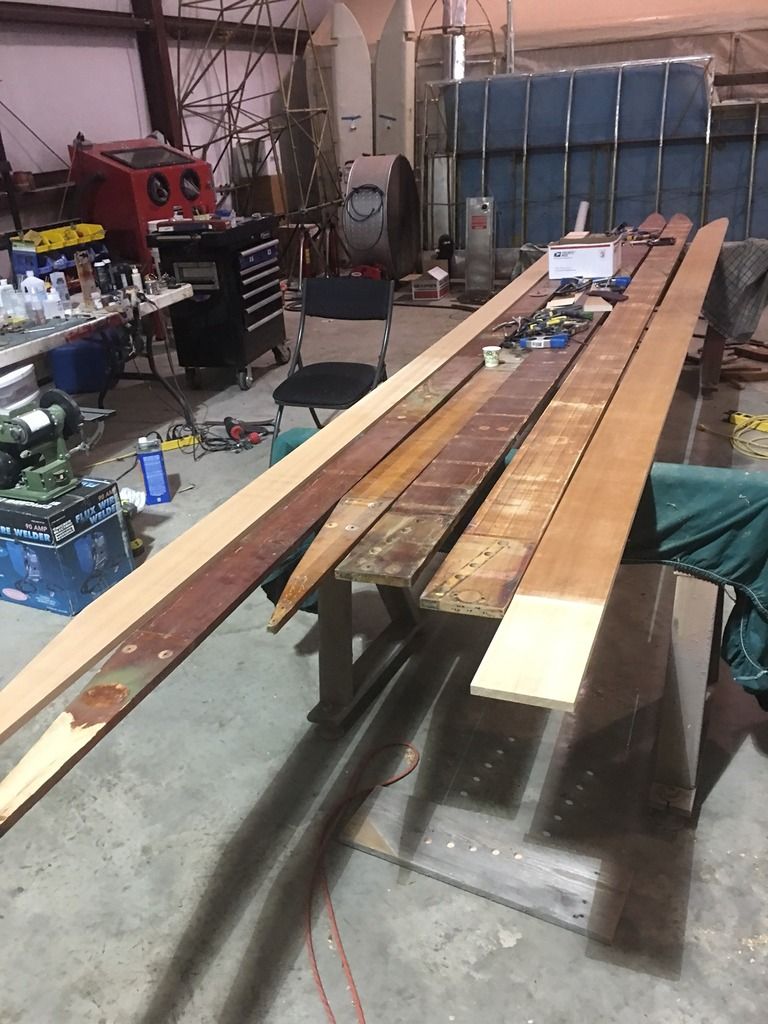
    I started the teardown of N96262 back in August. About 6 weeks ago I purchased another BC-12D project from a fellow in Texas - mainly because I wanted the C-85 and prop that came with it, but also some parts I thought I could use - including 4 spar blanks. Well, the blanks didn't turn out so hot after all. Two of the four had already been cut at one end, and the profile does not match a Tcraft - scratch those. A neighbor and I cut and planed two of the blanks to shape for the right wing. My IA took a close look and does not like the grain in these pieces - scratch them too. So... now I've got 4 blanks coming from Aircraft Spruce. They're supposed to ship out Dec 9.

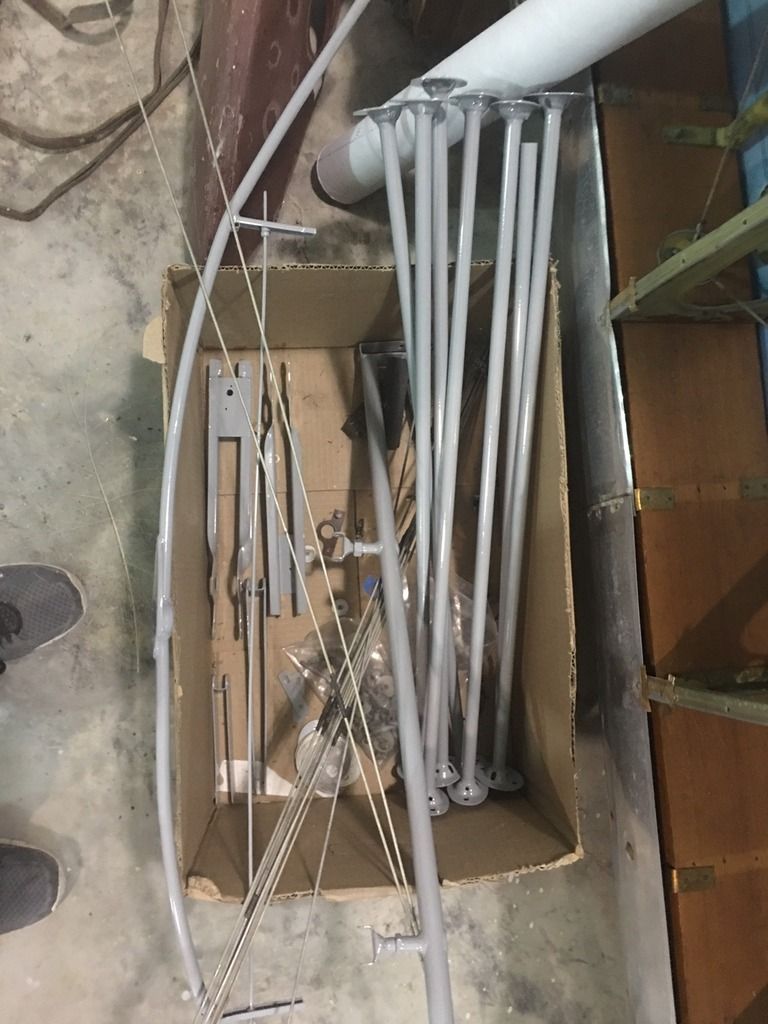
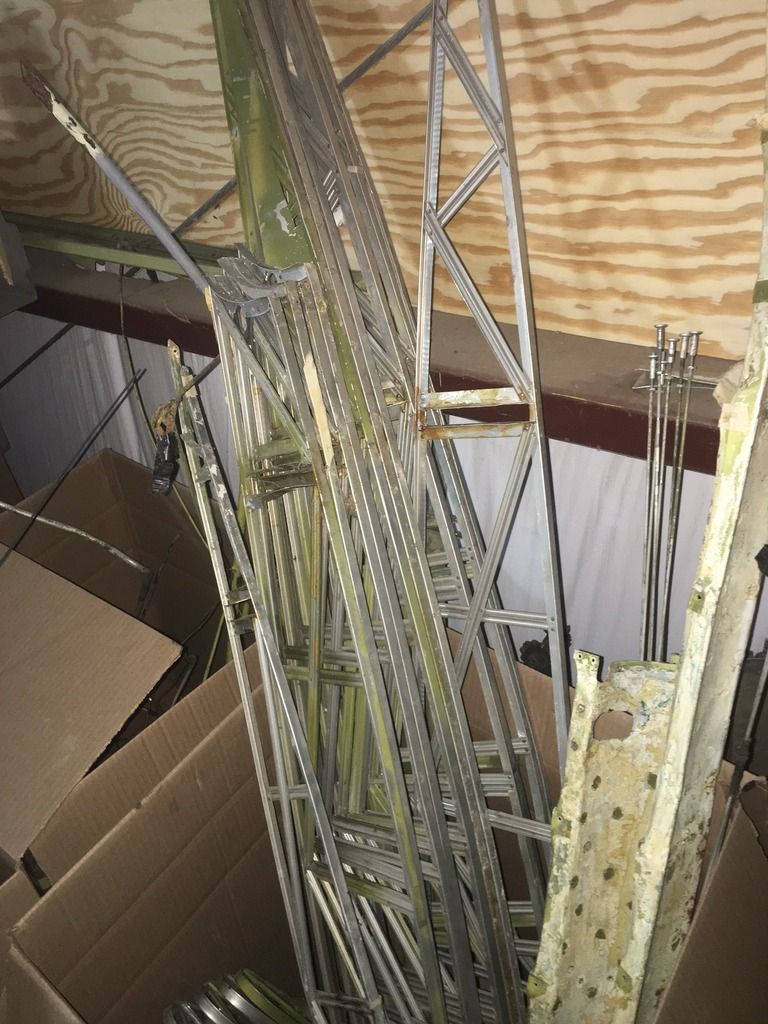
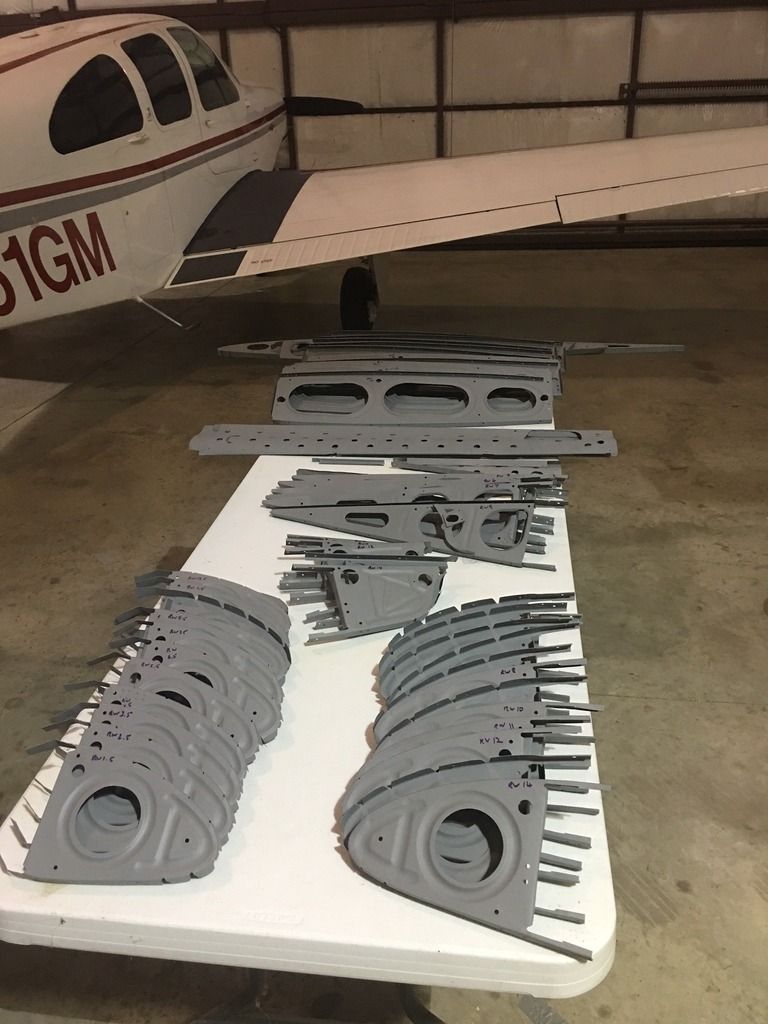
    In the meanwhile I've completely disassembled 3 wings now - my right wing, and the two from the project. One wing of the project had pre-war stick ribs, so I've got almost a complete wing's worth of stick ribs if anybody's interested. Most are useable. I've been straightening, repairing, cleaning and painting wing parts for the better part of two months now. Finally finished up today. Hopefully I'll have two new spars ready to go shortly, and in a couple of weeks get started building the right wing. Here's a few pics, included the box of stick ribs.

    -Brian


    Brian Cantrell
    1946 Taylorcraft BC-12D, N96262
    1961 N35 Bonanza, N61GM

  • #2
    Re: Some wing progress

    PM me with the info on the stick rib info. Tim

    Don't forget that the wing wires get positioned so they are trailing outboard down for the washout, its critical for them so they don't chafe. Tim
    N29787
    '41 BC12-65

    Comment


    • #3
      Re: Some wing progress

      Originally posted by astjp2 View Post
      PM me with the info on the stick rib info. Tim

      Don't forget that the wing wires get positioned so they are trailing outboard down for the washout, its critical for them so they don't chafe. Tim
      So for clarity, I think what you mean is the outboard end of each anti-drag wire will be slightly lower than the outboard of each drag wire when the wing has the correct wash-out incorporated. So the drag wires (wires extending from front I/B to rear O/B) end up on top of the anti-drag wires (wires from rear I/B to front O/B) in each bay. Yes?
      Scott
      CF-CLR Blog: http://c-fclr.blogspot.ca/

      Comment


      • #4
        Re: Some wing progress

        Those wing parts look very nice, look like you put a lot of labor into them. I would not toss the the spars that you have they can be used in some fashion, lots of old spars are glued together.

        Comment


        • #5
          Re: Some wing progress

          This gets really confusing to a LOT of people but there is an easy check. When you put the wing together just twist the tip trailing edge UP a little on the table and see if the wires spread apart or get closer together (probably touching). You are REDUCING the tip angle of attack by twisting the wing tip TE up. It doesn't take a lot to see some significant spread or closing of the drag and anti-drag wires. When you REDUCE the tip angle of attack you want the wires to move FURTHER apart.

          Don't feel bad if you get it backwards. I have seen some very experienced builders get it wrong. Also best to just hook up two wires in an easy bay to do the check. No sense having to re-do the whole wing if you can catch it early.

          Hank

          Originally posted by Scott View Post
          So for clarity, I think what you mean is the outboard end of each anti-drag wire will be slightly lower than the outboard of each drag wire when the wing has the correct wash-out incorporated. So the drag wires (wires extending from front I/B to rear O/B) end up on top of the anti-drag wires (wires from rear I/B to front O/B) in each bay. Yes?

          Comment


          • #6
            Re: Some wing progress

            As an additional comment, don't use lacing cord to tie the two wires together where they cross. Make a 1/32 thick plywood circle, about 1.5 inches dia, with four holes, that sits between the crossed wires, and lace it snugly in place (but not tight), to prevent any potential chafing, but which still allows a small amount of movement. A square one will do also.

            Unprotected and tightly wrapped (even with electricians tape or similar), the crossed wires will eventually make a single-point-of-contact, which might create a stress-raiser, and if tied tightly together, there is no flexibility allowed due to flight loads, wing flexing and temperature changes.

            I'll try to remember to get a photo in the next few days.

            Rob

            Comment


            • #7
              Re: Some wing progress

              Tim - Hank beat you to the punch with a pm about the stick ribs. I'm gonna hold on to them for a little while though, just to see if I have any parts needs that pop up that I might use them to trade for.

              Thanks for the pointers about the wires. I'll definitely check for clearance with washout applied. They originally had some friction tape wrapped around them where they cross. I'm having a hard time visualizing your thin plywood circle Rob, a pic would be helpful. There were no signs of wear or damage underneath the tape. Seems to have worked pretty well for the first 70 years. That's probably what I'll go back with.

              I did pick up four welded steel aileron hinges - 2 bell crank hinges, and 2 of the plain hinges. After bead blasting and inspection, my magnesium ones really aren't in bad shape. I planning to use the best two. Each wing will have one Magnesium and two Steel hinges, unless I run across two more steel ones pretty soon.
              Brian Cantrell
              1946 Taylorcraft BC-12D, N96262
              1961 N35 Bonanza, N61GM

              Comment


              • #8
                Re: Some wing progress

                Tim, drop me a line and maybe we can work together. I'm going to need a whole set + of stick ribs so one way or another I may have to make some from scratch. Maybe we can work together. Two sets at once will be easier than two sets independently. Several of us have been looking at a run of the "T" stock and using a good rib to make a fixture.

                Hank

                Comment


                • #9
                  Re: Some wing progress

                  Originally posted by cbcfly View Post
                  ...I'm having a hard time visualizing your thin plywood circle Rob, a pic would be helpful.
                  Hello Brian,
                  This is the sort of thing I meant (these are square, and not on my aeroplane. They are also not very neat, and should be varnished of course ).

                  The purpose is to spread any load, or potential load, or potential chafing along that short length of each wire, rather than promoting a single point of contact where they cross.


                  The above photo is from a Pitts that I am helping restore, and upon complettion these will be a little better presented.

                  Regards,
                  Rob

                  Comment


                  • #10
                    Re: Some wing progress

                    That is neat. Last time I saw them was on a WW-1 plane! LOTS of them on a Jenny. Never thought of using them on ours, but much better than the factory tape wraps. I would NOT use safety wire!!!! DO it with rib cord or shoe laces (from "official" FAA approved flight boots of course) NOT wire that could cause corrosion too.

                    Comment


                    • #11
                      Re: Some wing progress

                      Originally posted by Hank Jarrett View Post
                      I would NOT use safety wire!!!!
                      No-one is suggesting that, so why bring it up?

                      Rob

                      Comment


                      • #12
                        Re: Some wing progress

                        Only because it seems to be the first thing many guys reach for. Not pointing fingers at someone here. I have just seen some really strange things on the wings I am breaking down. Stuff that would make me shiver if I saw it on an annual. Same with the fuselage I was breaking down that had so many problems we ended up cutting it up. I don't want to loose a friend again and a lot of the guys are starting to do a lot of their own maintenance. What looks insane to someone with experience often looks perfectly normal to a new guy and our A&Ps and IAs can't catch everything.

                        Hank

                        Comment


                        • #13
                          Re: Some wing progress

                          Nomex string or rib lacing chord only.
                          N29787
                          '41 BC12-65

                          Comment


                          • #14
                            Re: Some wing progress

                            Thanks for the pic Rob. I see what you mean now. Right now I'm thinking a two inch length of nylon tubing on each wire, laced like you've pictured with rib lacing cord, would have the same effect, and be a lot faster/easier. Thoughts?
                            Brian Cantrell
                            1946 Taylorcraft BC-12D, N96262
                            1961 N35 Bonanza, N61GM

                            Comment


                            • #15
                              Re: Some wing progress

                              No, it will spread the wires, just wrap each wire with 1-2 wraps of cloth tape and tie together with nomex string. The tape is where they have electrical tape at ace hardware. That is what they used originally and is pliable enough to not deform or chaff the drag/antidrag wires. tim
                              N29787
                              '41 BC12-65

                              Comment

                              Working...
                              X