Announcement

Collapse
No announcement yet.

Right wing re-build finished, quick question

Collapse
X
 
  • Filter
  • Time
  • Show
Clear All
new posts

  • Right wing re-build finished, quick question

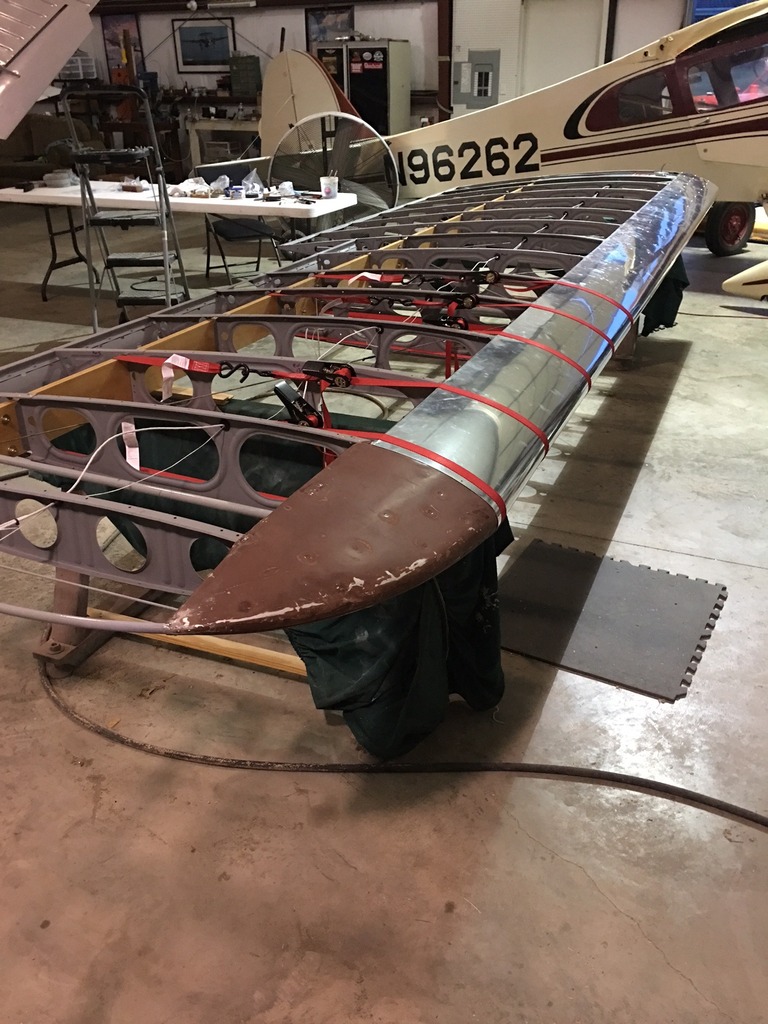
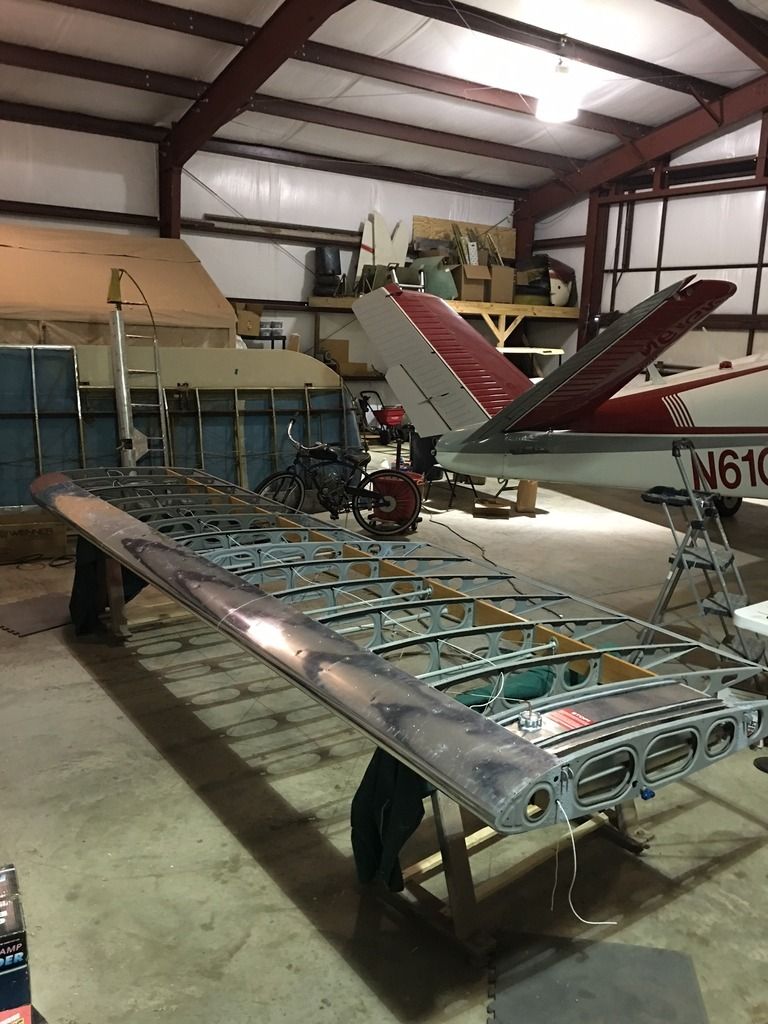
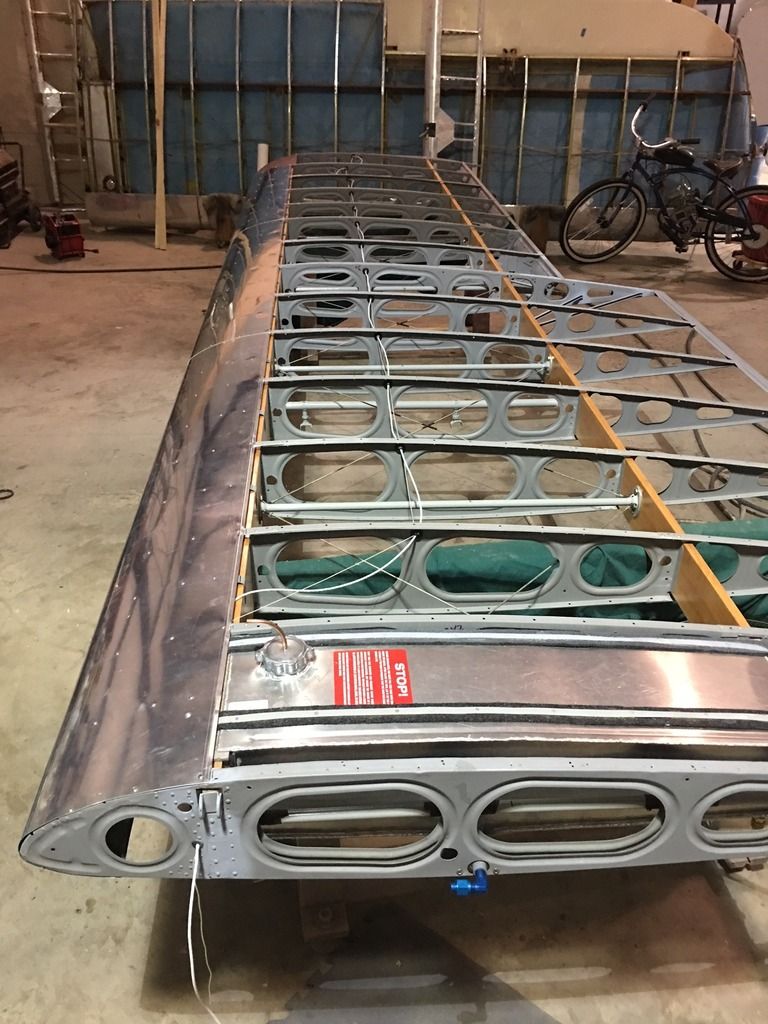
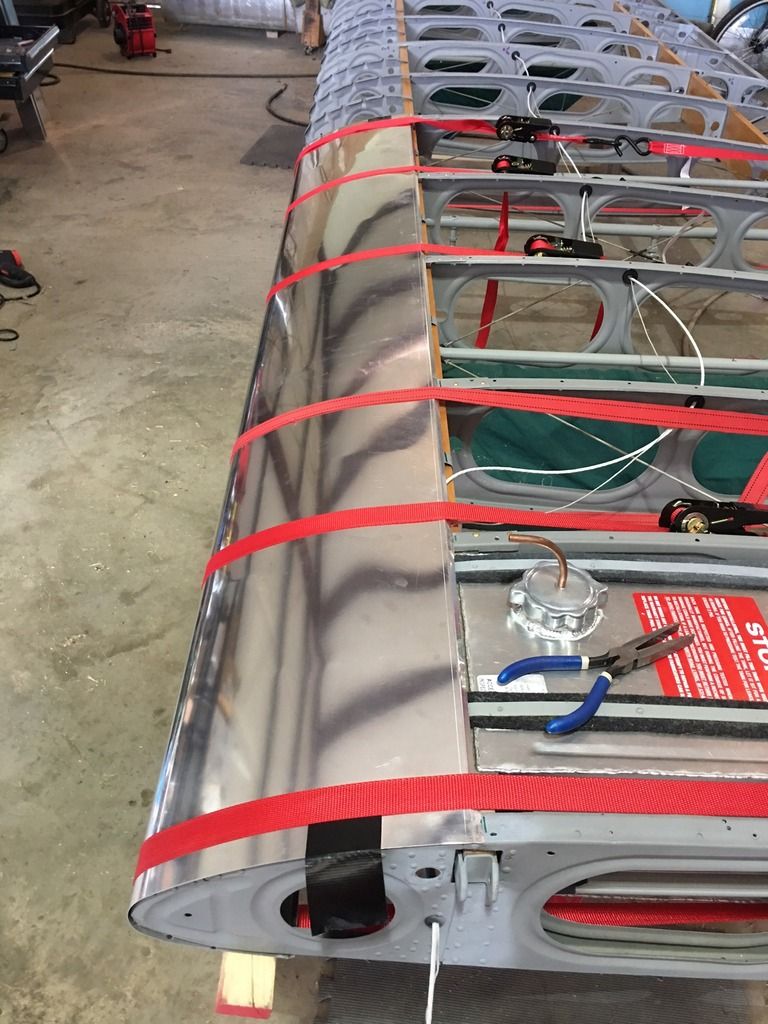
    Thank you guys for the pointers along the way. I think I finished up the right wing today. The strap method worked fine on the LE skins.

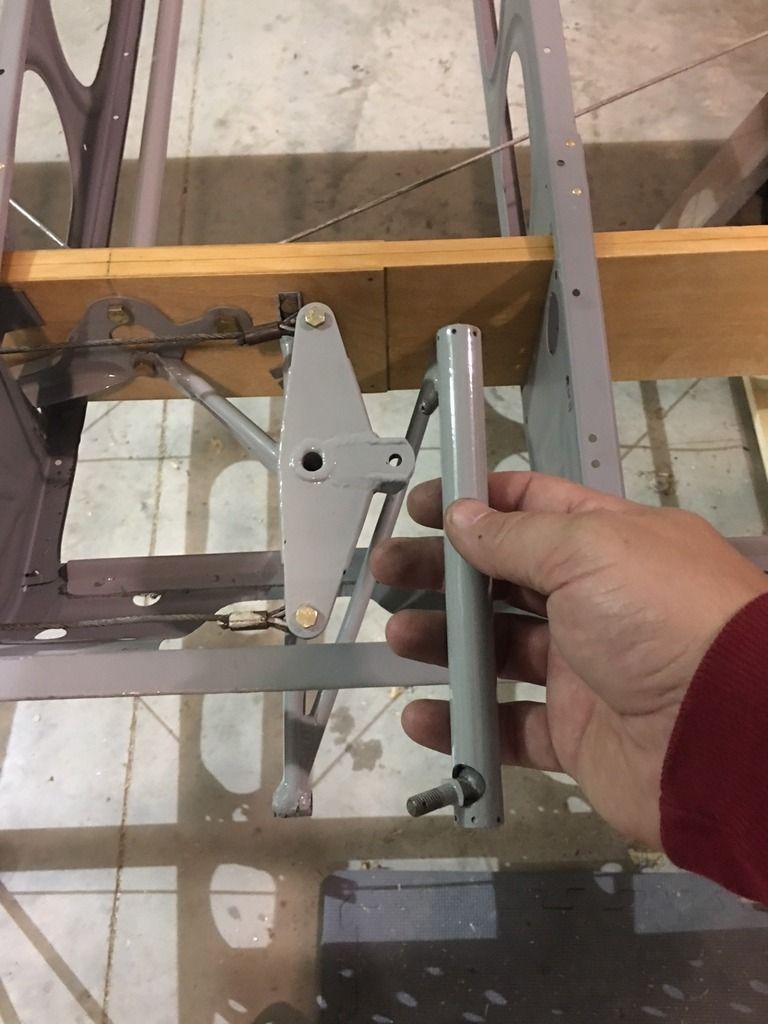
    I've got a quick question about the aileron bell crank and it's associated pushrod. I don't think there's room in the aileron to attach the pushrod after fabric installation - so it needs to be attached before fabric. I also don't think there's enough room above the bellcrank to attach the pushrod in the wing after fabric. Seems I do remember there being an inspection cover above the bellcrank though. I saved the old fabric, but without me going and digging it out, do any of you remember the sequence of installing that pushrod? Is there a hole above it in the fabric to allow mounting after covering? There's a pic of what I'm talking about below. Thanks!

    [IMG][/IMG]
    [IMG][/IMG]

    [IMG][/IMG]

    [IMG][/IMG]

    [IMG][/IMG]
    Brian Cantrell
    1946 Taylorcraft BC-12D, N96262
    1961 N35 Bonanza, N61GM

  • #2
    Re: Right wing re-build finished, quick question

    I install them after the fabric goes on...but I also have a bunch of tools to make it happen.
    N29787
    '41 BC12-65

    Comment


    • #3
      Re: Right wing re-build finished, quick question

      Take the rods apart and clean, make sure that the inside tube slides freely. Lube (I used grease and anti-seize).

      When you assemble you put the forward screw into position first (and cotter key) then assemble whole thing and tighten the aft screw to apply pressure to the forward and aft ball. When you get it all correct then install aft cotter pin.

      That's what I recall.

      Dave R

      Comment


      • #4
        Re: Right wing re-build finished, quick question

        Ahhh.... That makes more sense. I didn't know the inside portion would slide. Duh. I don't think I had both ends of the pushrod loose at the same time when I removed the aileron. No wonder I couldn't get the ball to drop out of the whole.

        So is there an inspection plate above the bellcrank, or no?
        Brian Cantrell
        1946 Taylorcraft BC-12D, N96262
        1961 N35 Bonanza, N61GM

        Comment


        • #5
          Re: Right wing re-build finished, quick question

          I had an inspection hole installed above the bell crank so my mechanic could service the components. This diagram discusses the location and options for inspection holes:

          Gary
          Attached Files
          N36007 1941 BF12-65 STC'd as BC12D-4-85

          Comment


          • #6
            Re: Right wing re-build finished, quick question

            Originally posted by cbcfly View Post
            Ahhh.... That makes more sense. I didn't know the inside portion would slide. Duh. I don't think I had both ends of the pushrod loose at the same time when I removed the aileron. No wonder I couldn't get the ball to drop out of the whole.

            So is there an inspection plate above the bellcrank, or no?
            My pre-war had a rectangular screw down inspection plate.

            On my bc12d I put an inspection ring of the belcrank but did not cut it out. That was in 1998 and it is still not been cut out, never found a need and the ailerons have been off and put back on in that period.

            Dave R

            Comment


            • #7
              Re: Right wing re-build finished, quick question

              In my case with both upper and lower inspection holes the mechanic was able to easily adjust and re-safety both ends of the pushrod tube over the ball end bolts, tighten the inner ball end bolts to the bell crank and safety, and clean out dirt from and lube the bellcrank through the upper hole in same (see in #1 above with welded brackets). Then re-seal the hole with a cork instead of dirt and water. And it makes inspection easy.

              Yes with enough ingenuity, dexterity, and mirrors most of that's possible from the rear or below. But why perform a brain operation through the rectum?

              Gary
              N36007 1941 BF12-65 STC'd as BC12D-4-85

              Comment


              • #8
                Re: Right wing re-build finished, quick question

                Originally posted by PA1195 View Post
                In my case with both upper and lower inspection holes the mechanic was able to easily adjust and re-safety both ends of the pushrod tube over the ball end bolts, tighten the inner ball end bolts to the bell crank and safety, and clean out dirt from and lube the bellcrank through the upper hole in same (see in #1 above with welded brackets). Then re-seal the hole with a cork instead of dirt and water. And it makes inspection easy.

                Yes with enough ingenuity, dexterity, and mirrors most of that's possible from the rear or below. But why perform a brain operation through the rectum?

                Gary
                LOL

                That's almost how they put my stents in!

                LOL

                Comment


                • #9
                  Re: Right wing re-build finished, quick question

                  Originally posted by PA1195 View Post
                  Then re-seal the hole with a cork instead of dirt and water. And it makes inspection easy. Gary
                  That is something worth noting. There should be a cork on the hole on the bell crank. It creates a oil reservoir for lubrication of the pivot.

                  Comment


                  • #10
                    Re: Right wing re-build finished, quick question

                    That cork seal deal was real. The upper aileron crank holes on mine were visible plugged with fine dirt. Apparently that detail escaped notice for many years and rebuilds. Once the upper inspection cover was installed curiosity made us clean it out and it then became obvious the intent at some point was to provide a path for oil. Someone suggested taking wine corks and trimming them with a belt sander to fit and seal. I guess others have come up with that as well.

                    Question please ref the posts above: Is there an insert in the pushrod tube that needs maintenance? We just lubed and adjusted the slotted end caps over the ball ends.

                    Gary
                    N36007 1941 BF12-65 STC'd as BC12D-4-85

                    Comment


                    • #11
                      Re: Right wing re-build finished, quick question

                      I would say that anytime you have the pushrod removed that it should be disassembled cleaned and lubricated. I have seen before when the spacer inside the tube was corroded and stuck in place.

                      Comment


                      • #12
                        Re: Right wing re-build finished, quick question

                        Ok and thanks for the info on the inside spacer. I can see how that's needed. What I might do during the next Annual is remove them (easy now with the two inspection holes top and bottom) and do what you suggest. That way we can access the hardware and IRAN. Might squirt some Kroil on the ends prior in case they're gummed up. The plane is 5 yrs older than me and who knows when they were apart last.

                        Gary
                        N36007 1941 BF12-65 STC'd as BC12D-4-85

                        Comment


                        • #13
                          Re: Right wing re-build finished, quick question

                          The way the pushrod is designed if you tighten the screw on one end it should tighten on both balls. If the spacer is stuck, then it doesn't tighten like it should.

                          Comment


                          • #14
                            Re: Right wing re-build finished, quick question

                            Is the spacer solid or hollow? Cupped ends or flat? I'm wondering if it were cut in two could a coil spring be inserted mid-span to maintain tension on the ball end fasteners?

                            My mechanic adjusted both ends on both pushrods to eliminate some but not all free play. He didn't want to wear the ball out but now I see Wag-Aero sells them if they're needed.

                            Gary
                            N36007 1941 BF12-65 STC'd as BC12D-4-85

                            Comment


                            • #15
                              Re: Right wing re-build finished, quick question

                              There is a separate cup that sits at each end of the internal rod (one of mine is hollow, the other solid; both have flat ends) and the end caps (the threaded ones with the cotter pin X-slot) is the other cup. Each pair of cups retains the ball.

                              Rob

                              Comment

                              Working...
                              X