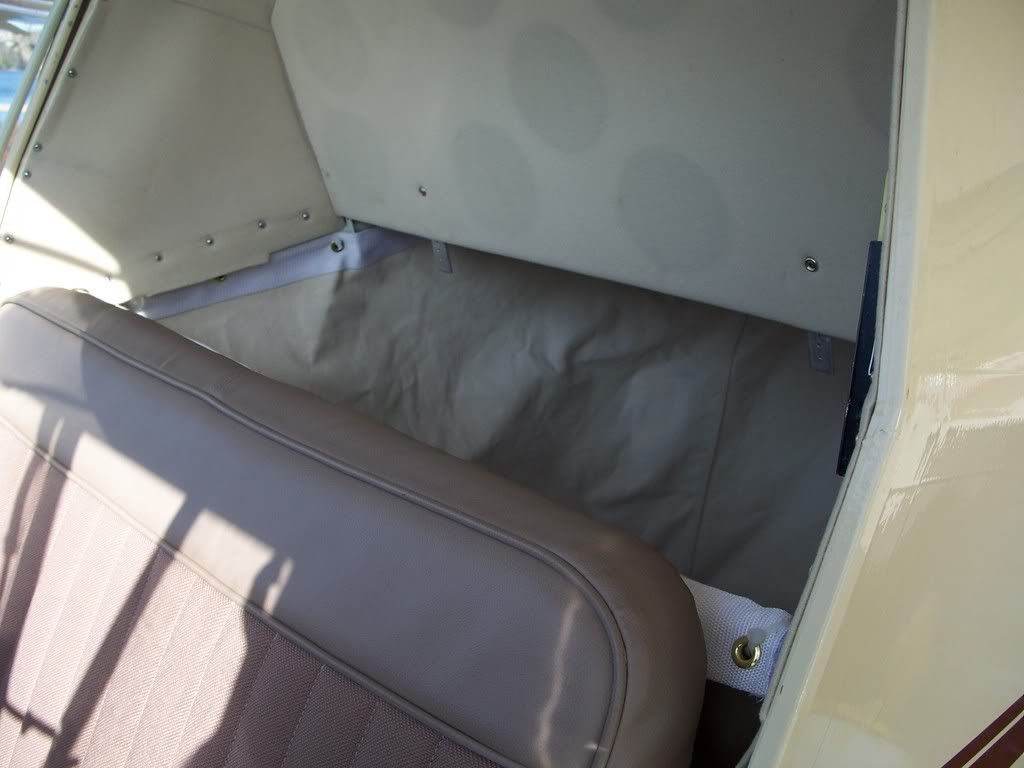
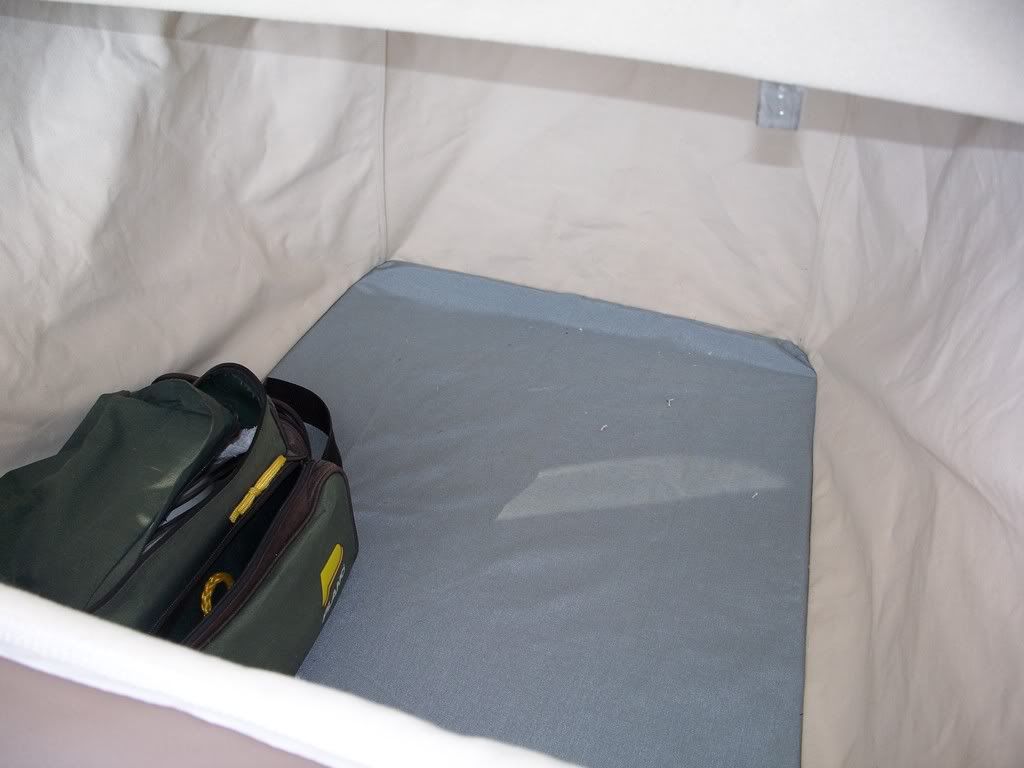
I am doing the Harer conversion on my BC12D. I am nearing the point of covering, but I want to be sure to have everything done that is possible before I do that. The drawings skim over how you go about finishing out the baggage compartment. There are drawings showing sheet aluminum just behind the seat. And it mentions plywood across the rear bulkhead. But it says to use fabric on the sides and around the rear windows. What is everyone attaching the fabric to along the bottom and across the tops of both sides? Pictures anyone?
Announcement
Collapse
No announcement yet.
Finished Baggage Compartment
Collapse
X
-
Re: Finished Baggage Compartment
We used fabric for the whole thing, (not baggage increase, just opened up the back end for more room). I wrapped the fabric starting in the outside of the tube and brough it around and put it inside the vertical tubes. The top and the bottom tube are actually inside the fabric See these pics in te gallery. Hope this helps. I have some better ons around if you need it.
Ryan
Ryan Newell
1946 BC12D NC43754
1953 15A N23JW
TF#897
-
Re: Finished Baggage Compartment
The fabric baggage compartment is beautiful! But how are you going to prevent a screwdriver or your tent stakes or your baggage from puncturing it?Taylorcraft : Making Better Aviators for 75 Years... and Counting
Bill Berle
TF#693
http://www.ezflaphandle.com
http://www.grantstar.net
N26451 (1940 BL(C)-65) 1988-90
N47DN (Auster Autocrat) 1992-93
N96121 (1946 BC-12D-85) 1998-99
N29544 (1940 BL(C)-85) 2005-08
Comment
-
Re: Finished Baggage Compartment
And more importantly, how do you inspect behind that fabric??? I've never been a big fan of that method...J3's are notorious for finding all sorts of crap down in there when you recover them.
Most of the ones I've seen done, had thin veneer on all sides of the extended baggage.
JohnI'm so far behind, I think I'm ahead
Comment
-
Re: Finished Baggage Compartment
I like the look of the fabric.
But I am curious about the veneer. Is there a way to install it where you can get it back out reasonably easy for inspections? Do I need to weld in some extra tabs like I did for the baggage floor.Richard Pearson
N43381
Fort Worth, Texas
Comment
-
Re: Finished Baggage Compartment
IMHO, if you really want to do it the best possible way for maintenance and accessibility, weld in the tabs (with holes in the tabs) and put either Tinnerman "clip nuts" on the tab, or weld 10-32 nuts on the back of the tabs.Originally posted by Pearson View PostI like the look of the fabric.
But I am curious about the veneer. Is there a way to install it where you can get it back out reasonably easy for inspections? Do I need to weld in some extra tabs like I did for the baggage floor.Taylorcraft : Making Better Aviators for 75 Years... and Counting
Bill Berle
TF#693
http://www.ezflaphandle.com
http://www.grantstar.net
N26451 (1940 BL(C)-65) 1988-90
N47DN (Auster Autocrat) 1992-93
N96121 (1946 BC-12D-85) 1998-99
N29544 (1940 BL(C)-85) 2005-08
Comment
-
Re: Finished Baggage Compartment
Thanks Bill. As far as baggage goes I am keeping the A65 so it is not an extended baggagebut rather an open area. I still have the mounts for the sling for oshkosh. Will probably fly it without. T craft is for tooloin around and bothering the neighbors. The tent and the cooler go in the pa20/22 pacer...
RyanRyan Newell
1946 BC12D NC43754
1953 15A N23JW
TF#897
Comment
-
Re: Finished Baggage Compartment
The trouble with my design is that it attaches to the tubing that runs through the middle of the window...I don't have the back windows on this plane...my other BC12D has the same baggage compartment, but has the smaller triangular type windows. I attach this baggage "sling" with tie wraps around the tubing and the 4 corners at the bottom are attached to the tubing at the bottom of the fuselage the same way...the plywood was installed in the floor first of course. You could design this to work with the Model 19 Windows i'm sure....You'd just have to get creative. My IA loves this setup by the way...you just cut the tie wraps...inspect the tubing all the way back and re-install in minutes with new tie wraps.
Here are pictures of the baggage compartment in my other T-craft...
http://gallery.taylorcraft.org/main.php?g2_itemId=3746
http://gallery.taylorcraft.org/main.php?g2_itemId=3749
And here is my new T-Craft...I kept the headliner unchanged in this one. I have since slotted the area where the welded braket bulges out where the cross member from the original baggage sling was attached.
[IMG] [/IMG]
Last edited by Dano"T"; 10-07-2008, 05:05.
Comment
-
Re: Finished Baggage Compartment
Dano T,
Thank you! Thank you! I really like your ideas for this. I can see how someone could quite easily modify this to work with the big windows in the rear. I am eager to start measuring and conjuring up my own version of your design.
Thanks again!Richard Pearson
N43381
Fort Worth, Texas
Comment

 [/IMG]
Comment