I'm faced with replacing my tailpost. Anyone else done it? - Mike
Announcement
Collapse
No announcement yet.
Replacing the tailpost?
Collapse
X
-
Re: Replacing the tailpost?
You make it sound like a walk in the parkOriginally posted by N96337 View PostYep, just cut/grind it out and put a new one in.....just like any other welded in tube, watch the alignment and make sure everything's lined up before final welding.
JH
Nothing going to spring apart from what I can see.
Any jigging your prefer or anything that strikes my fancy?
Relieved to know that I don't have to grind down to that plate;
- MikeMike Horowitz
Falls Church, Va
BC-12D, N5188M
TF - 14954
Comment
-
Re: Replacing the tailpost?
Mike,
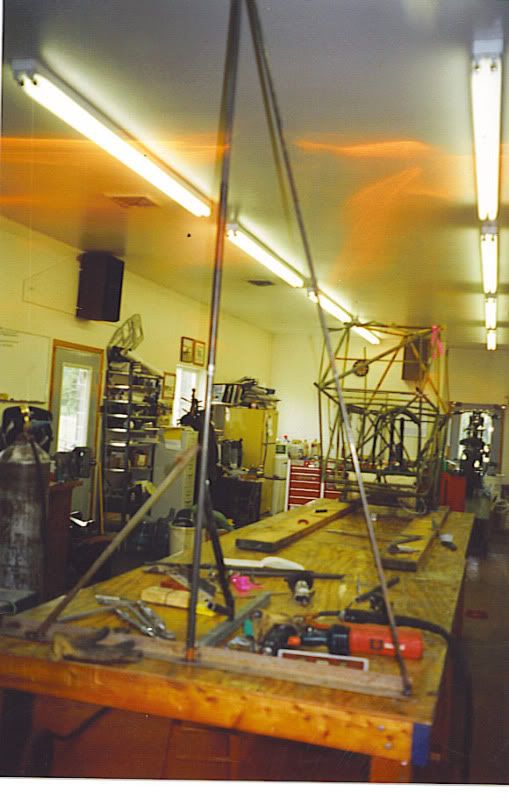
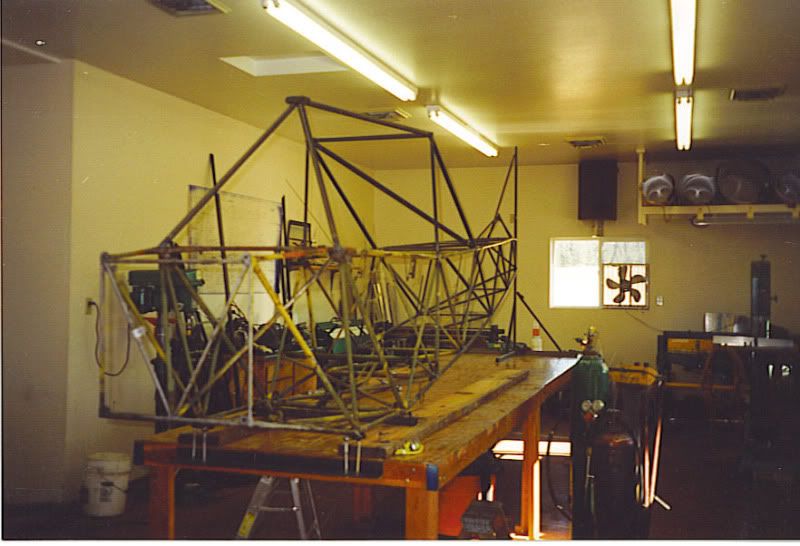
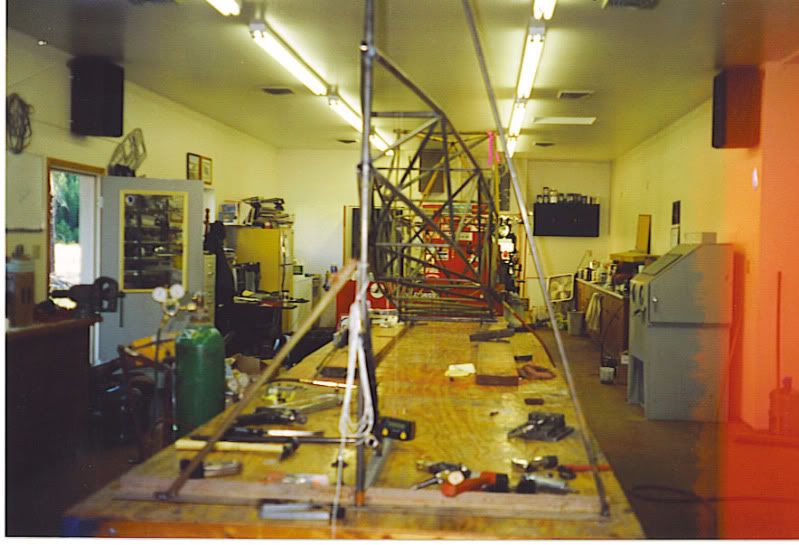
When I do something like that, I get the fuselage well anchored and level....very level in all pertinent directions! I've got tables that bolt to the floor, then the airframe is bolted to the table. That sounds pretty serious, but it's not a big deal. I've used wood tables, screwed to wood floors, with the fuselage attached by brackets made of plumbers tape and sheetrock screws...whatever it takes to make it stable and keep it level when you work on it. Here's a couple pics of a '41 J3 I did a huge amount of replacing on. The thing was bad enough that I cut it off behind the pilot's seat, and above the top longeron and threw all that away, then built new from there.


It turned out great, and was on wooden tables, bolted to wooden floors, during the winter. I always check the relationships of everything before and after final welding, just in case.... If it's level and secure through the gear/cabin area, then you know if you level the tail and everything that the tailpost should be straight up and down. Spend the money on a digital level such as a "Smart Level" and use it...it's worth it's weight in gold! I probably do things "overkill" a bit, as I doubt the thing was that accurate when it was new...but who knows...at least I know it's square and plumb when it leaves my shop.
It's kinda like flying a long cross country... if you look at it from start to finish it sounds like a big deal to fly from Montana to Virginia...but if you look at each individual leg, it's just a bunch of "normal" length flights all added together... same with a repair like this...just a bunch of smaller repairs added together....don't let it intimidate ya.
JohnI'm so far behind, I think I'm ahead
Comment
-
Re: Replacing the tailpost?
John - so your "go to"/basic holding bracket is steel straping holding the tubing to a wood frame. I'm visualizing that and it looks like it might have more movement than I'd want; perhaps bits of wood on either side and screwed into the wood along side the strapping would do the trick; I'll just have to try.Originally posted by N96337 View PostMike,
with the fuselage attached by brackets made of plumbers tape and sheetrock screws...
You've given a great example of a major project which requires substantial jigging; Please visualize removing the tailpost but leaving everything else entact.... can you see anything springing apart? I was planning on a set of angle iron stops that would insure the new tailpost position right/left, fore/aft,and in yaw, simply by positioning the angle (of the angle iron) so the tubing fit in the grove and then securing the angle iron in position; doing that high and low would help me re-position the new tailpiece. Again, no protection against anything springing apart, again, I don't see anything that might spring apart but could use a second imagination looking at the problem.
Thanks, I needed that. There are times when the big picture is overwhelming and I ask "what the hell have I done?", then I calm down and tell myself yes, you can worry about the engine; write down your concerns and put it in the Tcraft restoration folder, BUT YOU DONT NEED TO DO THE WORK NOW. This phase is simply getting rust/paint off and repriming as much as I can before taking it home for any follow-up sandblasting/priming, building some kind of shelter, and two major welding efforts. Gotta get that done this summer. That's the goal. Now that I've announced it; that makes it official! - MikeIt's kinda like flying a long cross country... if you look at it from start to finish it sounds like a big deal to fly from Montana to Virginia...but if you look at each individual leg, it's just a bunch of "normal" length flights all added together... same with a repair like this...just a bunch of smaller repairs added together....don't let it intimidate ya.
JohnMike Horowitz
Falls Church, Va
BC-12D, N5188M
TF - 14954
Comment
-
Re: Replacing the tailpost?
Mike,
There shouldn't be anything that springs apart. If it does, that's telling you that there's stress somewhere....better figure out where it is, and address that issue as well. When we cut the lower door frame on that Cub, it sounded like you'd shot a gun!! We'd been having a bit of trouble getting all 4 corners of the gear attach points to be in the same plane, and by measuring, figured out that it was on the right side... somewhere I have a picture of the tube once cut, and it was out alignment by about 3/8", as well as sprung apart by about 1/2". Once the stress was relieved, everything fell right into place.
The "plumber's tape" that I used was just to hold the tube into a cradle, like you're saying. If you look at that picture of the fuselage on the tables, you can see a piece of square tubing across the table, and through the rear gear attach points. That was bolted to the table in about 6 places, then the fuselage bolted through the attach fittings to the tube. The forward one is a piece of angle iron with 2 bolts on each side running up to the forward attach fittings, so that we could adjust and keep a solid tension/compression in both directions through those fittings, and keep the fuselage level in both directions. The tail post is anchored by angle iron at the bottom to the table and a "guy strut" runs diagonally to the top, and is anchored to the table at the lower end too. It actually worked like a charm. If I was doing nothing but J3's or Tcrafts or whatever, I'd make more of a "jig" out of steel to work them on...but I'm doing everything from Stinsons to Tcrafts, so I have to have the flexibility to make them all fit on the same fixture, so there's not much reason to get too elaborate with it. The biggest difference in a setup like that and a nice steel "jig" is that I may have to adjust it just a little every now and then if the humidity and temps change a bunch. I worked in a place that did helicopter tail boom rebuilds once, and we had these huge, super precise jigs, and to tell the truth, they're just like any other tool..only as accurate as the person using them.
Getting overwhelmed is the death of many many projects, from rebuilds to homebuilts.....and it's very easy to get caught up in!! Been there, done that! It's tough to emphasize enough that during a rebuild or initial build, that there's going to be months that it looks like nothing is happening....and that gets terribly frustrating!! Then the next day, it looks like you got a whole bunch done.... I try not to set specific "Dates" that things will be done by... that tends to add to the frustration to me, but for some people that's what works. Find what works for you, and stick to it. Some people like to have everything in one room, all there in plain sight....some like nothing but the project at hand to be in the room...it's all personal preference. I had 9 Stinsons in my shop at one time, all apart, waiting for rebuilds....that got to me and it wasn't long before I was totally overwhelmed. Once I got the extras cleaned out of the shop and in storage, I was ok again.
Hang in there....
JohnI'm so far behind, I think I'm ahead
Comment
Comment